
Traditional Mexican Dishes
How to Make Rosca de Reyes, a Traditional Mexican Recipe
Prepare a traditional Mexican-style Rosca de Reyes: a soft and aromatic sweet bread, perfumed with orange, lemon, and vanilla, decorated with guava or quince paste, candied fruits, and the classic golden sweet dough. Ideal for sharing on King's Day with hot chocolate, coffee, or atole.
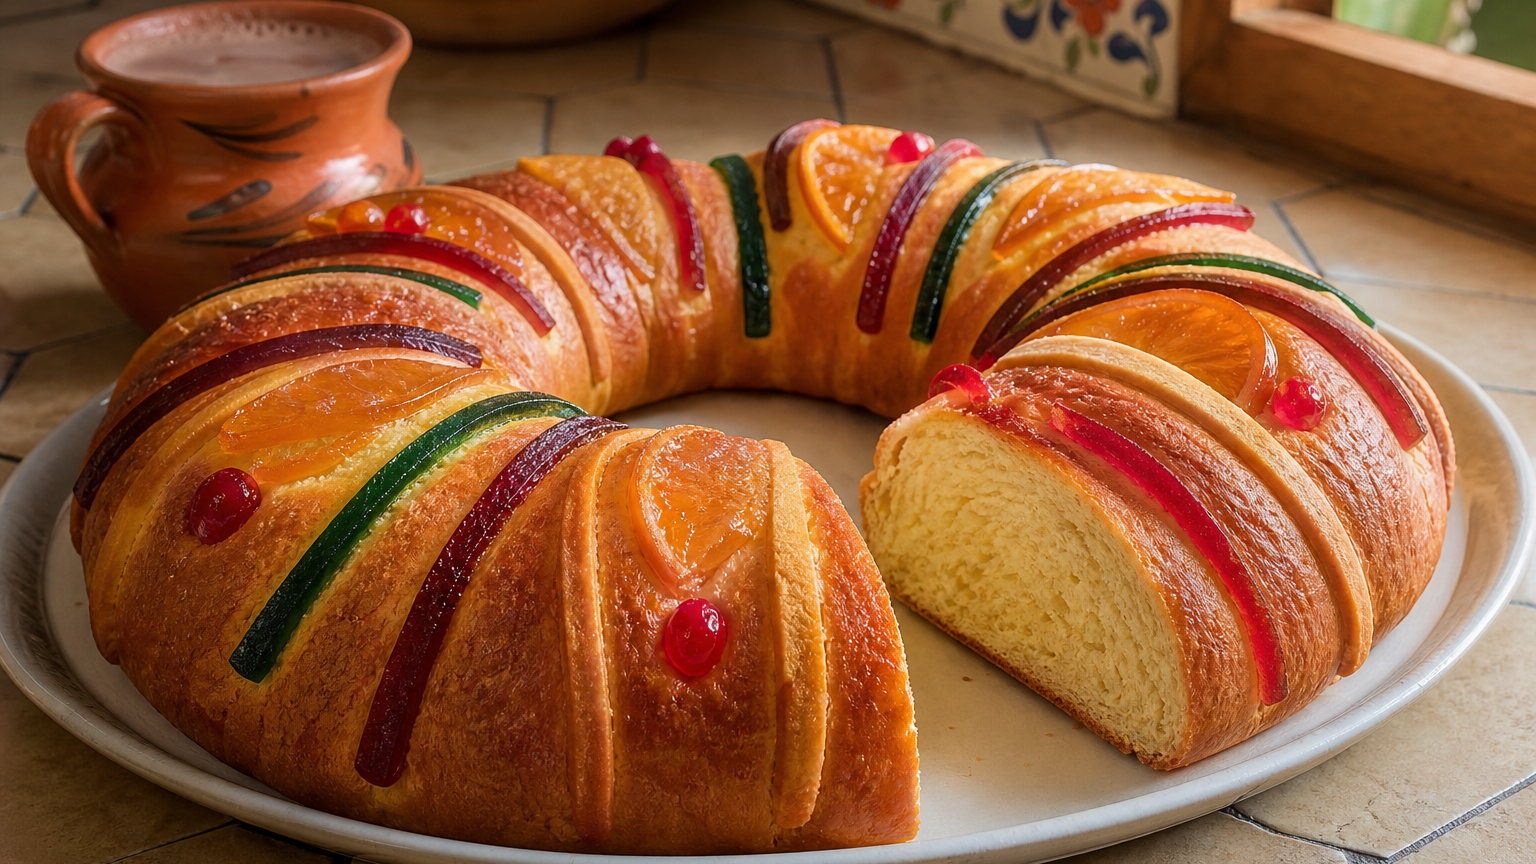
This large rosca yields approximately 10 servings and combines a tender crumb with a colorful and festive decoration. The figures of the Baby Jesus are placed only when the rosca is completely cold.
01
Ingredients
Have everything ready before you begin.
- ✓500 g of strong wheat flour or common wheat flour
- ✓100 g of sugar
- ✓7 g of instant dry yeast
- ✓1/2 teaspoon of salt
- ✓120 ml of warm milk
- ✓3 eggs
- ✓120 g of unsalted butter, at room temperature
- ✓1 teaspoon of vanilla extract
- ✓Fine zest of 1 orange
- ✓Fine zest of 1 lemon
- ✓100 g of guava or quince paste
- ✓50 g of candied cherries
- ✓50 g of candied orange
- ✓1 beaten egg, for glazing
- ✓3 small heat-resistant figures, well washed and completely dry
- ✓50 g of butter, for sweet dough
- ✓50 g of powdered sugar, for sweet dough
- ✓50 g of flour, for sweet dough
- ✓1 egg yolk, for sweet dough
02
Step-by-step method
- 01
Mix in a large bowl the flour, sugar, dry yeast...
Mix in a large bowl the flour, sugar, dry yeast, and salt, distributing the ingredients evenly.
- 02
Make a hole in the center and add the warm milk, the three eggs, the...
Make a hole in the center and add the warm milk, the three eggs, the vanilla, and the zests of orange and lemon.
- 03
Mix with a spoon or by hand until there are no dry flour areas...
Mix with a spoon or by hand until there are no dry flour areas. The dough will be sticky, which is normal.
- 04
Incorporate the butter gradually, in several pieces, kneading after...
Incorporate the butter gradually, in several pieces, kneading after each addition. By hand, work the dough on a lightly floured surface for 10 to 15 minutes; with a dough hook mixer, knead first at low speed and then at medium speed.
- 05
Continue kneading until you get a smooth and elastic dough that can...
Continue kneading until you get a smooth and elastic dough that can be stretched without breaking easily. Avoid adding too much flour so the rosca doesn't become heavy.
- 06
Form a ball, place it in a lightly greased bowl, cover it, and let it...
Form a ball, place it in a lightly greased bowl, cover it, and let it rest between 1 and 1 1/2 hours, until it has clearly increased in size.
- 07
While the dough ferments, prepare the sweet dough by mixing the butter...
While the dough ferments, prepare the sweet dough by mixing the butter at room temperature with the powdered sugar. Add the egg yolk and then the flour, until a smooth paste forms. Wrap it and refrigerate for about 15 minutes.
- 08
Cut the guava or quince paste into thin strips and drain the candied...
Cut the guava or quince paste into thin strips and drain the candied orange and cherries well to avoid moistening the surface of the rosca.
- 09
When the dough has risen, transfer it to the table and gently press...
When the dough has risen, transfer it to the table and gently press to remove excess air. Form a long cylinder, join the ends, and create a crown on a baking sheet lined with parchment paper.
- 10
Open and widen the center of the rosca, as the dough will grow during...
Open and widen the center of the rosca, as the dough will grow during the second rest and baking.
- 11
Cover the rosca and let it rest between 45 minutes and 1 hour
Cover the rosca and let it rest between 45 minutes and 1 hour. Meanwhile, preheat the oven to 180 °C.
- 12
Glaze the entire surface with the beaten egg
Glaze the entire surface with the beaten egg. Stretch the sweet dough into strips and place them on the rosca, leaving space between them.
- 13
Distribute the guava or quince paste, candied orange, and cherries...
Distribute the guava or quince paste, candied orange, and cherries in a balanced way, pressing them lightly so they stick without overloading the dough.
- 14
Bake for 25 to 35 minutes, until the rosca is golden and firm
Bake for 25 to 35 minutes, until the rosca is golden and firm. If it browns too quickly, cover it lightly with aluminum foil.
- 15
Check if it's ready by gently tapping the base
Check if it's ready by gently tapping the base; it should sound slightly hollow. You can also insert a toothpick into an area of dough, avoiding the candied fruit; it should come out without raw dough.
- 16
Remove the rosca from the oven and let it cool completely on a wire...
Remove the rosca from the oven and let it cool completely on a wire rack.
- 17
When it's cold, make three small cuts on the bottom and insert the...
When it's cold, make three small cuts on the bottom and insert the figures inside, without piercing the surface. Turn the rosca to hide the openings.
- 18
Serve the rosca at room temperature with hot chocolate, coffee, or...
Serve the rosca at room temperature with hot chocolate, coffee, or atole. Warn guests that it contains figures and they should eat carefully.
- Don't add too much flour during kneading: a slightly sticky dough produces a tenderer rosca.
- Respect both the first rising and the second rest after shaping the crown.
- Leave a wide central hole so it doesn't close when the dough grows.
- Drain the candied fruits well before placing them on the rosca.
- Place the figures only when the rosca is completely cold.
- Keep the rosca well covered for one or two days. To recover its softness, heat a slice for a few seconds, watching the candied fruit.