
Traditional Chilean Dishes
Chilean Hallullas: the authentic recipe from Chile
Prepare homemade Chilean hallullas, round, tender, and slightly flaky. A traditional, simple recipe perfect for enjoying at eleven with butter, avocado, cheese, or your favorite fillings.
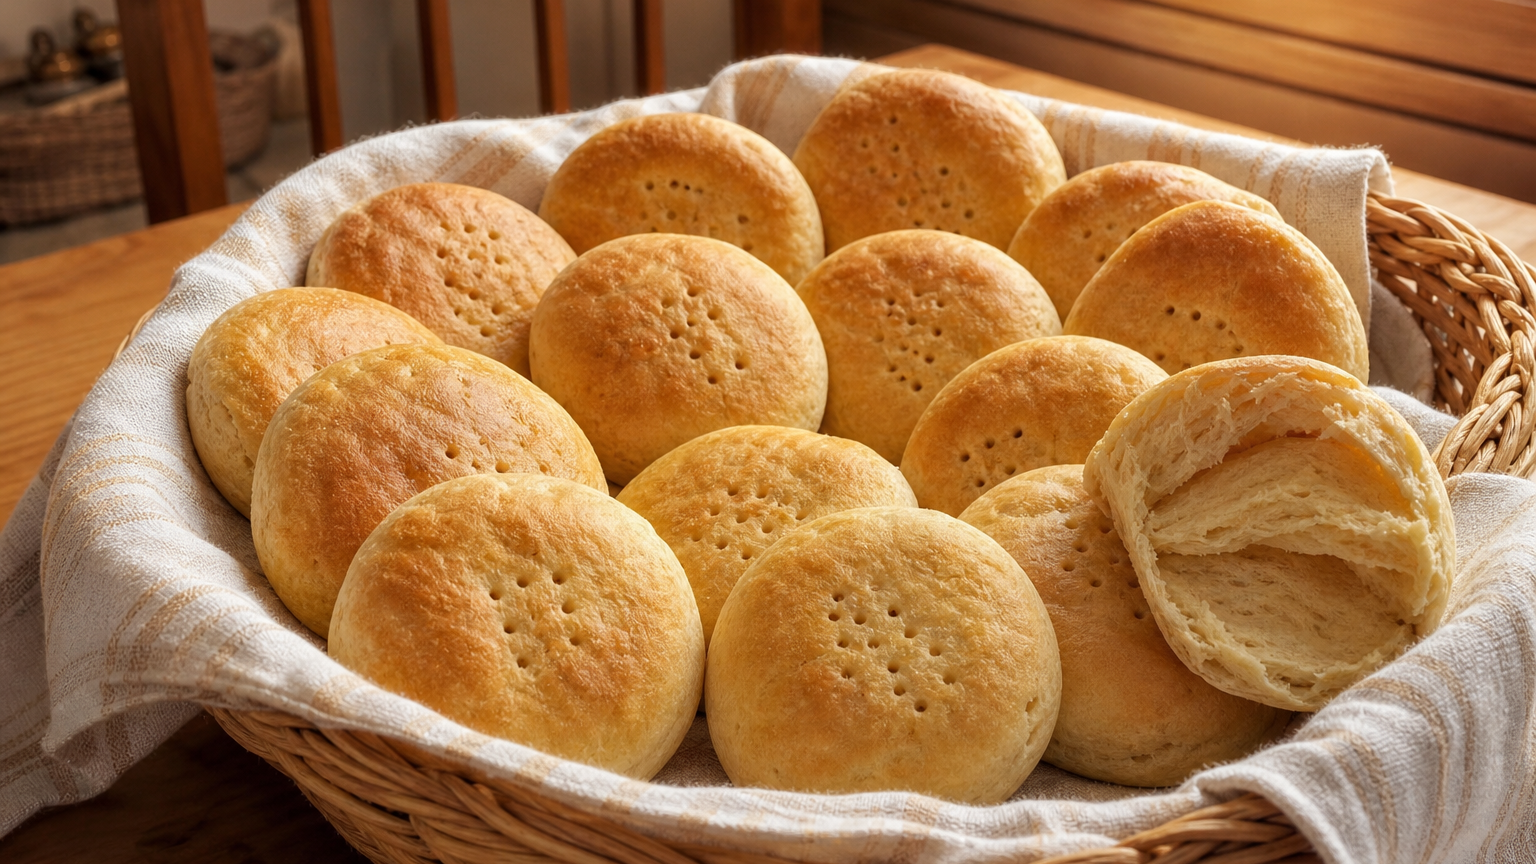
These Chilean hallullas have a soft crumb, firm edges, and a delicate golden exterior. The secret lies in working the butter with the flour, respecting the rest, and stretching the dough to the right thickness.
01
Ingredients
Have everything ready before you begin.
- ✓500 g of unprepared wheat flour
- ✓10 g of baking powder
- ✓10 g of salt
- ✓10 g of sugar
- ✓100 g of unsalted butter at room temperature
- ✓250 ml of warm milk
- ✓50 ml of warm water
02
Step-by-step method
- 01
Place the flour in a large container
Place the flour in a large container. Add the baking powder, salt, and sugar, and mix very well to distribute the ingredients evenly.
- 02
Incorporate the soft butter and rub it with the flour using your fingertips
Incorporate the soft butter and rub it with the flour using your fingertips, until you get a texture similar to fine crumbs. If you use lard instead of butter, proceed in the same way.
- 03
Add the warm milk and water gradually
Add the warm milk and water gradually. Mix first with a spoon and then with your hands until you form a smooth, compact, and slightly damp dough, but not sticky.
- 04
Knead the dough on the table for five to seven minutes
Knead the dough on the table for five to seven minutes, until the ingredients are well integrated and the surface looks uniform.
- 05
Form a ball, cover it with a clean cloth, and let it rest for twenty minutes
Form a ball, cover it with a clean cloth, and let it rest for twenty minutes.
- 06
Lightly flour the table and roll out the dough to a thickness of about half a centimeter
Lightly flour the table and roll out the dough to a thickness of about half a centimeter.
- 07
Fold the dough over itself once, like closing a book, and roll it out gently again
Fold the dough over itself once, like closing a book, and roll it out gently again. If it resists, let it rest for five minutes before continuing.
- 08
Cut out the hallullas with a round cutter of about ten centimeters or with the edge of a glass
Cut out the hallullas with a round cutter of about ten centimeters or with the edge of a glass. Press firmly and vertically, without turning the cutter too much.
- 09
Gather the scraps, press them gently, roll them out again, and cut out more hallullas
Gather the scraps, press them gently, roll them out again, and cut out more hallullas. Avoid overworking the leftovers so they don't become tough.
- 10
Place the hallullas on a baking sheet and prick their surface several times with a fork
Place the hallullas on a baking sheet and prick their surface several times with a fork.
- 11
Preheat the oven to 200 °C, with heat up and down
Preheat the oven to 200 °C, with heat up and down. While it's heating up, let the hallullas rest on the baking sheet for ten minutes.
- 12
Bake for 15 to 20 minutes, until they are lightly golden and have firm edges
Bake for 15 to 20 minutes, until they are lightly golden on top and have firm edges. Keep an eye on them especially in the last minutes to avoid them getting too dark.
- 13
Remove the hallullas from the oven and let them rest for five minutes on the baking sheet
Remove the hallullas from the oven and let them rest for five minutes on the baking sheet. Then, transfer them to a wire rack so they don't accumulate moisture at the base.
- 14
Serve them warm with butter, cheese, avocado, or your preferred filling
Serve them warm with butter, cheese, avocado, or your preferred filling.
- Don't add all the liquid at once, as each flour absorbs a different amount.
- If the dough is too dry, add water gradually; if it's too sticky, sprinkle a minimal amount of flour.
- Don't develop the dough like a yeast bread: just integrate the ingredients well and get a uniform surface.
- Prick the hallullas before baking to avoid them inflating irregularly.
- For a more tender hallulla, leave the dough a bit thicker; for a crisper version, roll it out slightly thinner without breaking it.
- You can replace the 100 g of butter with 100 g of lard.
- Keep an eye on the baking time, as it may vary depending on the oven and the thickness of the hallullas.
- Store them in a well-closed container for one or two days and heat them briefly before serving. You can also freeze them once they're cool and reheat them directly in the oven.